Showing posts with label beads. Show all posts

Thursday, March 5, 2015

A Mini Project for Non-Wizards

Math problem: if you have a craft project that takes a person familiar with the technique at least 4 hours to complete, how might you conduct a class of newbies to finish a project in under 2 hours?

When I was invited to teach a class on Viking Knit at the my local arts center, I didn't think it could be done. The smallest thing I usually create is a bracelet, which would take way too long for a single class. I'd have to be a time-condensing wizard to make that happen. Since I'm not a wizard, I needed to get creative.

Solution: invent a different, smaller project for the students.

I was inspired by the necklace below, first found on Pintrest, created by the woman who posted it to this web page.


First, I have to say, her technique is lovely, and the pearls are a really great accent. Thank you for creating this, Necklace Maker!

My students will not have time to double knit or to add accent beads, but I figured a pendant like this would be an excellent beginner project.

Here is my prototype:


I think this will look great on a suede necklace cord. It took me about 45 minutes on my first exploratory try. It only needs about 4 of 5 inches of VK chain, a jump ring, and a necklace to hang it on.

I'm super excited to teach my first class in a couple weeks!

Monday, July 8, 2013

Good Things Come...

Here's one that's been waiting for its time to shine!


This fun wine-themed necklace here was inspired by the combination of the cluster of grape beads and the cork. They just seemed so right for each other! However, together they didn't make a complete piece of jewelry. 

As regular readers know, I'm a bargain-hunter and on a budget, so I couldn't just buy a bunch of supplies all at once and experiment like crazy. I had to wait for each new material, and plan the necklace piecemeal. In the end, serendipity brought everything to me. See how long it took me to assemble everything!

Gold colored chain --- acquired in thrift store June 2013
Shiny glass bead --- acquired in hobby shop March 2013
Bright copper wire --- acquired in 2012 and woven April 2013
Old wine cork --- acquired from mother late 2012
Cluster of beads --- acquired in a garage sale summer of 2011


Funny thing is, I'm still not done! (Observe the loose wire hanging from the VK weave!) A lot of my pieces come together slowly like this, but this one takes the cake for longest incubation time.

Future blog(s) to come on this necklace!

Sunday, June 2, 2013

Look Both Ways (Before Buying Beads)

Here are two bracelets I made. Only one of them exists.


Ok, ok, you caught me. Only one of these exists in the present. The first picture is before, the second is after alteration. I simply couldn't stand the first version....

In the beginning, after I'd finished "knitting" the bulk of the bracelet, I was very happy with the quality and colors, and I eagerly awaited its completion. But when I put the chain together with the end caps and clasp, something was missing. The design just begged for more flair.

I thought maybe a nice focal bead would do the trick, but none of the beads I already owned fit the bill -- they were too small or were not the right color.

To the hobby shop!!! I bought a string of some heavy glass beads whose color was a opalescent pink and champagne and gold. They were shiny and sparkly and -- I thought -- an excellent color match. (They were also on sale. Win.) I proudly brought them home, smug as a Viking sailing back from a good day's pillaging. Until I made a discovery....

Side A:

Side B:

Foiled by my own enthusiasm! I hadn't checked both sides of the beads to see if they were the same color or not. Who would have thought I'd have had to??? The first side was one set of colors, the second was a funny iridescent green.

I didn't like this green at all. It didn't suit the colors in the weave. But I wanted to give it a chance, and so played around, paired it with some smaller beads, and agonized for quite some time....

In the end, I still didn't like the big green bead. The smaller beads around it also rang hollow. The longer I examined my handiwork, the less I liked it, until I marched down to the hobby shop for new materials.


When back home, I cut the beads out, made my adjustments, and unveiled my new creation to the world.


These feather-shaped charms resonate much better with the gypsy "spirit" that inspired the chain in the first place, as well as improving the design in general. Maybe the sparkly big bead wasn't terrible, but I think I prefer the more earthy feeling of the metal feathers.

Personally, after all that trouble, I'm glad the other bracelet only exists in the past.

Friday, April 5, 2013

Variation on a Theme

This is my latest addition to my Etsy menagerie. It is a double knit pattern in light green-yellow (or chartreuse) silver-plated 26-gauge wire.

(For the record, the brand is Artistic Wire. I used a silver wire of this brand once before, and was disappointed by the coating peeling off. Not cool! But my second try with it was very satisfying -- lightweight, quite flexible, and no peeling!)


This bracelet is actually inspired by a recent custom ordered piece. Here is a photo.


This second bracelet is single knit with black and peacock blue beads inside the weave. (Incidentally, the beads are of Czech glass, whose sparkle I love and whose price I can afford!) Also, as you can see, I didn't put beads on each end of the chain, but instead there are bronze colored end caps.


As this piece was a custom order, I did not choose the wire color on my own, but rather I consulted with the buyer to make a special online purchase. Buying a single spool of wire online is not something I'd do normally, because shipping about doubles the total cost. It's also risky, as is any other online order.

I report with gratitude that the color was just what I'd hoped, the wire didn't peel or have any other defects, and furthermore, after I'd finished with the custom order, I was left with some wire to spare for my own amusement!


I really liked the blue beads with the green, so I stuck with that in the next bracelet, adding some new colors. (The beads from my matching madness have a cameo as well!) I also wanted the weave stronger and stiffer, hence the double knit. I like my second bracelet, but I think the color is so bright and fun that it calls for a design that is a little more complex.

Maybe another variation on this theme is in the future!

Friday, February 1, 2013

Tapering (and Getting on My Soap Box About Good Photography)

Hello, fellow adventurers! Here's a new necklace -- copper with wooden beads. (Looks quite a lot like a previous bracelet I've done!)


While I was finishing up the chain, pulling it through the draw plate, I felt as though it would benefit from some tapering at the ends near the clasp.

Here's the necklace that I modeled it after.


A side note here on the photography. For anyone who is thinking about selling anything online -- even on eBay or craigslist -- make sure you get at least semi-decent pictures, because it makes a world of difference how your item is perceived. Yes, I got a bit lazy with my necklace, as you can see. And whoever shot the other jewelry (possibly their creator,  Jan Raven) is a superior photographer. But it goes to prove my point -- good photography makes things look very attractive. Bad photography.... Well, I apologize for not taking better photos before sending this piece off to its owner!

Back to my point: this was the first piece in which I used the draw place to achieve a long taper. I am mostly satisfied with the result, although when I first looked at it, I wished my draw plate had more holes that were less drastically different sizes from one another so I could make a more gradual taper.

On the other hand, looking at Jan's jewelry, I rather think she had the same process. Instead of a slowing decreasing diameter, there is an illusion of gradual tapering where in fact there is one diameter for the most of the length of the chain between the beads and the clasp.

I have learned enough about design to know that it is the illusion that matters, not the reality. So, I think I can declare my experiment a success, and move on to the next piece!

Wednesday, November 14, 2012

Matching Madness


This bracelet came about when I noticed that I had some beads that matched a an outfit that I planned on wearing for a wedding this summer.

First, here's a close-up of the copper chain (which, if I do say so myself, turned out great).


And here it is! I was so excited to make this bracelet -- just look at how well the greens and blues match! I only had 2 days to whip this one up, but it was worth the effort.


I can proudly say that this bracelet is well-balanced, which makes it feel nice on my wrist, and also just looks fabulous. I'm so glad for the spark of inspiration my outfit gave me!

Tuesday, September 11, 2012

Xtreme beads!

Many of my pieces have featured beads inside the weave. But this green bracelet takes it to a whole new level.


Here is the weave. You can't get away from the beads. They are EVERYWHERE.

There is a red bracelet that I tried putting a bunch of beads in just at the ends, as you can see below.


It didn't turn out as striking as I had hoped, however. But it helped me learn for the next bracelet.... I decided to take the leap and try something I'd been hoping to experiment with.


The subtle beads, numerous as they are, cast a nice effect over the whole length of an otherwise bland VK chain. It also beefed up the single knit weave so it is a tougher. I think I may use this design again....

Sunday, August 26, 2012

Balance and Weight

Have you ever had a piece of jewelry (or clothing) that just refused to sit on you the way you wanted? Did you fidget with it to set it straight, only to have it shift again and again? Sometimes things do this because they are improperly balanced. Balance is one distinguishing factor between a good piece of jewelry and a bad one.

This may sound snobbish, but I've made enough less-than-stellar bracelets to be convinced of the difference.

Imagine how a simple piece of yarn feels around your wrist. Say that you want the little knot facing up, sitting on the top of your arm. It probably stays there fairly well, with only some shifting.

Now, imagine putting a heavy glass bead on the yarn. Because of it's weight, it will always swing underneath your wrist. If you wanted it on top, then that's bad design, since the bead is not sitting where you want it.

But let's say you DO want it down there. Fine. But now the yarn is kind of tight around the top part of your wrist, and it is uncomfortable. That's bad design. A piece of jewelry should both look and feel just right.

While I'd love to pretend to always make perfect jewelry, I just don't.

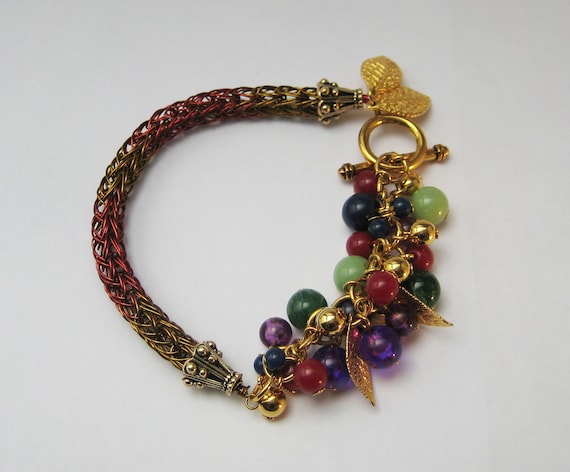
Most of my first bracelets did not have heavy things attached to them, so all this balance stuff was not a problem. My first piece to be heavily accoutered was this one:


It feels great on my wrist. While the bead cluster does tend to fall to the underside of my wrist, it happens slowly, and the VK portion is stiff enough that it keeps the distribution of weight spread out. Yay for me!

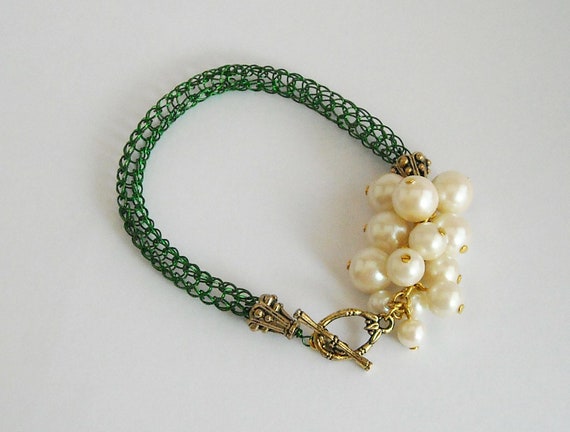
On the bracelet below, however, the pearl cluster drags itself down on the wearer's wrist.

Green Viking Knit bracelet with pearls

An otherwise attractive piece, it is not balanced well.

So here is another lesson on my way to actually making perfect jewelry. Or so I hope.

Wednesday, August 15, 2012

Re-purposing Looks Good On You

When I first started making VK, I naturally wove only simple chains. But within a month or two, I could tell I would get bored without other elements to add.

On my second trip to the hobby shop where I usually got my supplies, I bought a small bag of wooden beads. They were fun for a while, but it was a bit monotonous with only those. I wanted more things to play around with, but I did not have a lot of money to spend buying new supplies all the time.

The answer to fixing boredom on the cheap? Used jewelry!


Viking Knit Bracelet with reused autumn beads and leaves


This piece is made from a pair of earrings that I found at a garage sale.

For a while, the earrings sat in my box, lonely, and without purpose. Poor things. But I just didn't know what to do with them! I just hoped that someday they might be useful.

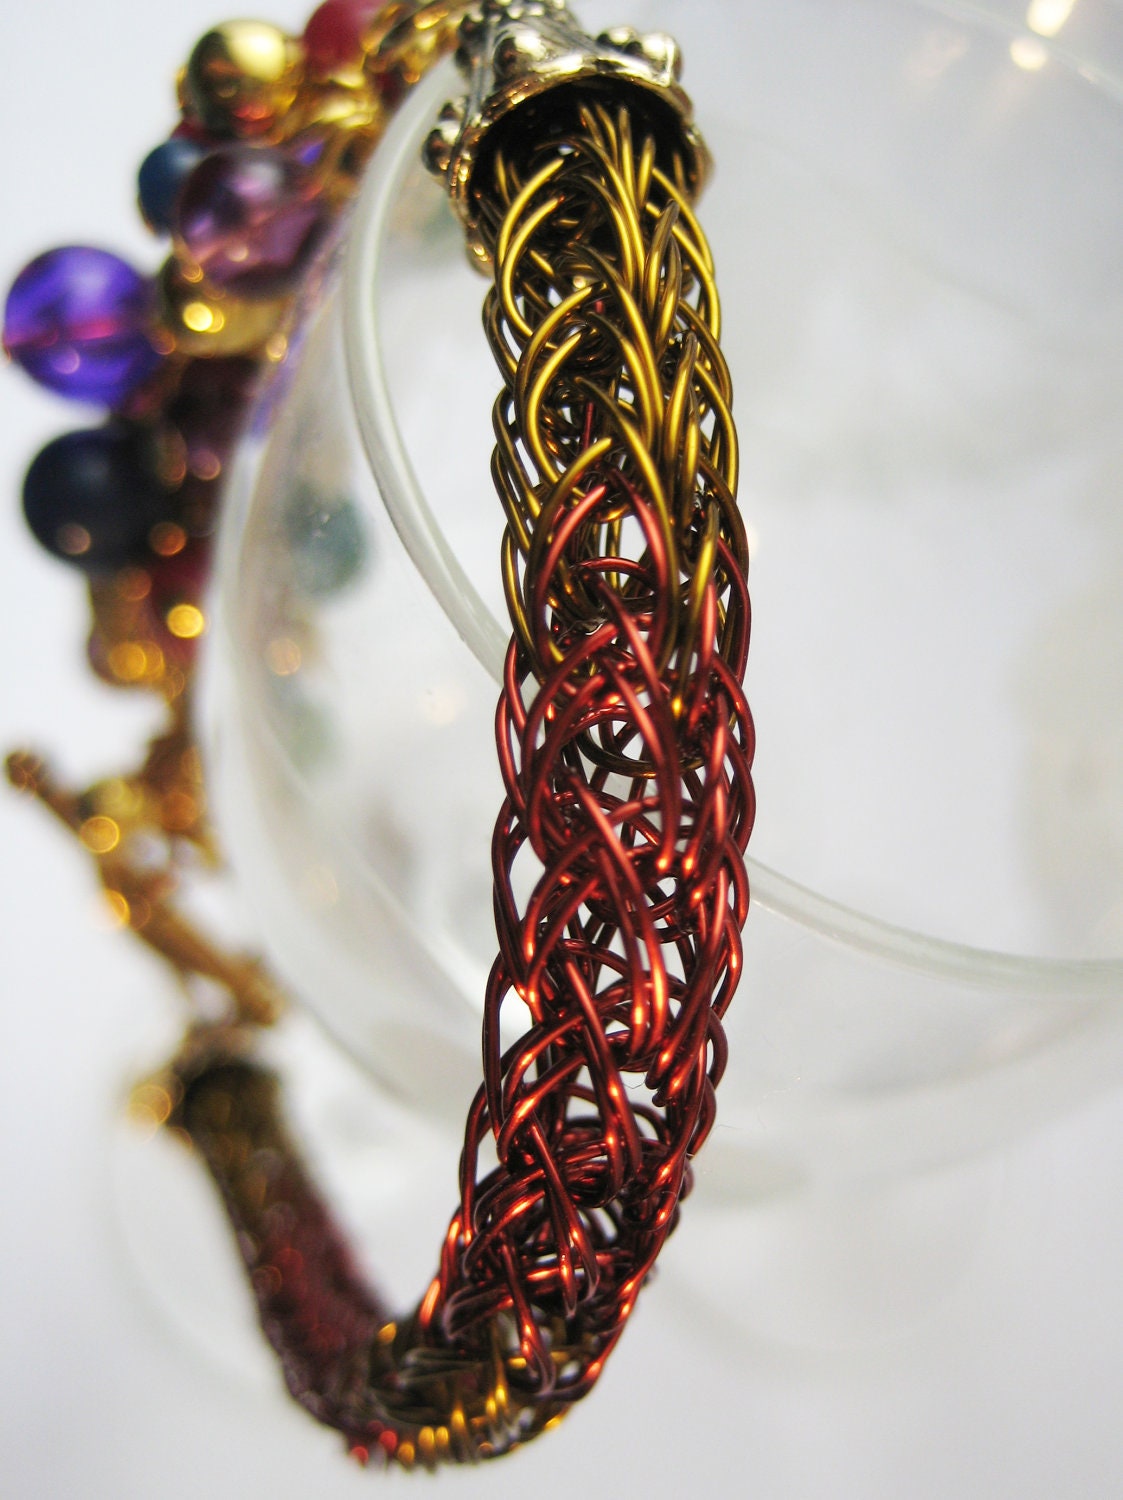
Their time to shine came after I'd woven a double-knit chain of red and gold. It was an experimental color combo, and indeed I didn't know how I was going to finish it off.

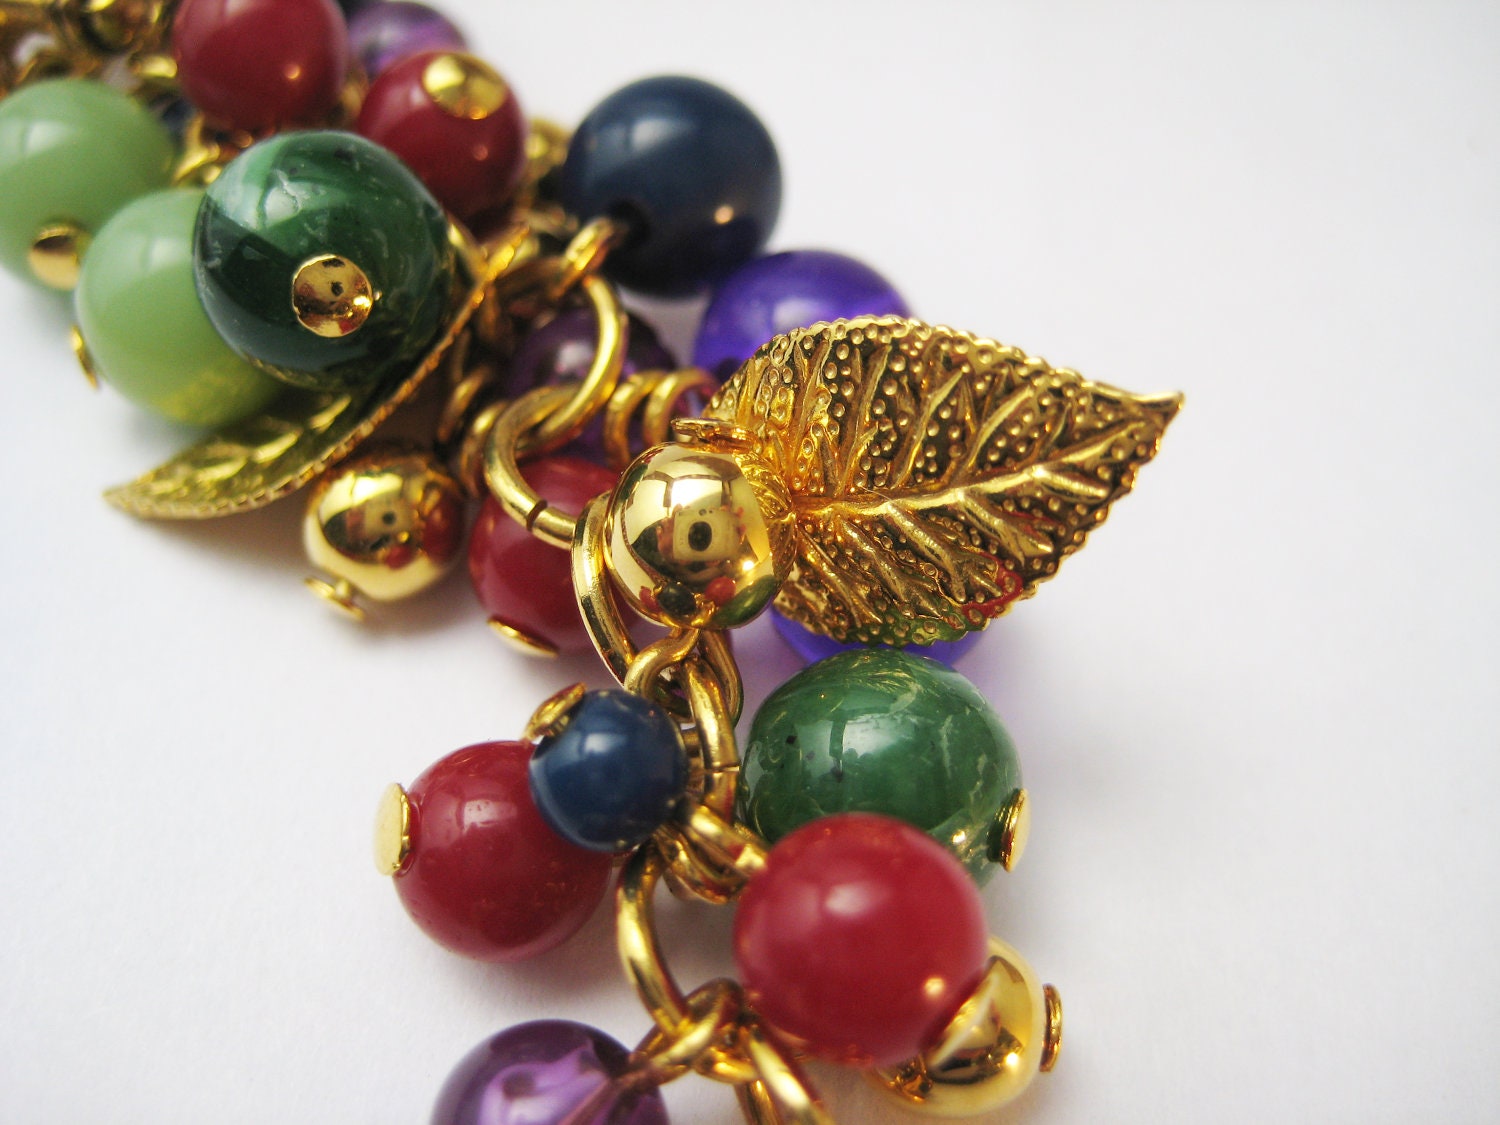
I think you can see what happened next. I disassembled and reassembled the earrings into a more bracelet-friendly shape, and attached one end to the chain and the other to a clasp. The earrings even had some gold-colored leaves that I artfully positioned at my whim.


Viking Knit Bracelet with reused autumn beads and leaves


Viking Knit Bracelet with reused autumn beads and leaves


The advantages of using re-purposed jewelry don't stop at their low cost. Not only does it introduce me to other peoples' jewelry design, which stretches my concept of what is possible for me to do, but using old jewelry means that my piece is absolutely unique to any other I might try to make. I will never find earrings like that ever again.

Read my next blog to see how his beautiful experiment taught me something that I'd never thought of before.

Thursday, June 28, 2012

Serendipity Put to Work

It screamed at me: aqua blue wire and aqua blue beads. I had been searching for two separate supplies, wire and clasps, and here were two that matched perfectly. How could I leave the store without them?

Well, when I got them home, I had a problem. I only had 2 clasps and enough wire for two bracelets. This meant that I only had two chances to make something out of my good luck.

No pressure. Not.

For a little while, all I had the courage to put together was a bracelet with no extra adornments. Then when I was only faced with one more option, I became a bit paralyzed. I didn't want to mess up my last shot, but I also didn't want to settle for making another plain bracelet. 

The end of the story is that I realized I was being silly, and I just went for it.

Below are photos of the two bracelets sitting on my wrist. 


As you can see, I chose to compliment and expand on the dark brown of the clasp with the variations of brown in some wooden beads. Here are some close-ups of the chain itself.


An additional lesson: in a past bracelet (see here), I introduced beads into the weave without damaging the chain. In that bracelet, the beads were visible between the wires, which I think was successful for the design. In the blue bracelet above, the beads are starting to "hide" in the weave. This was not what I had planned on. Whether or not it makes for a successful design is up to you to decide.


Thursday, June 21, 2012

Taking a Chance

After trying beads once before on a piece (see the copper bracelet from this post), I wanted to try a different look. I aimed for a more elegant and flashy design.

Here is the product, a bracelet made with 24-gauge silver colored wire and black and red czech glass beads.


I read somewhere that it is inadvisable to pull the wire chain through the draw plate when you have woven beads into it. (If you don't know what I'm talking about, see the terminology bullet points.) However, I have done exactly that with this piece. I was nervous to do so, because, it IS in fact, a bit inadvisable.

Why? The beads could have warped the wire mesh, making it messy-looking. (That may have been OK, or it may have been just ugly.) There was also a slim chance that I could have broken the chain trying to pull it through the draw plate.

But what brave Viking doesn't take some crazy chances once in a while?