You know what makes things take forever? Procrastination and fear.
Making my circuit board necklace took the span of a many weeks. Weeks! It took me so long because there were two things that this piece was missing that I had trouble making, and was timid about trying. One was end caps for the VK chain. The other was a bail, a thing that would hook the pendant onto the necklace.
Thanks to the magic of the internet, I found two tutorials that helped me fill those gaps.
There's this one on the Katrina Lum Designs blog on end caps.
And this one on bails made with head pins,which is a small length of wire with a flat knob at the end to keep things from falling off.
As I was making my copper necklace for the circuit board pendant, I knew I wanted silver end caps to go with the silver in the bits of the circuit board, but I didn't really like the style of either of my purchased end caps. The end cap tutorial was awesome for the look I wanted, but after a failed attempt at making a pair, I was discouraged and it took me a while to get up the guts to try again.
You can see in this image below that it didn't come out perfect (there is a gap in the loops).
Then, when I saw that the circuit board pendant didn't come with a bail to attach it to my necklace, I thought "No bail? No problem."
But pride comes before the fall.
I thought maybe I could just put a silver ring through the hole, but the pendant is almost a centimeter thick. I tried to make my own bail with some 20 gauge wire that I ordered especially for the job, but I had no idea what I was doing, so nothing I made turned out very nice-looking. I was starting to get really irritated, so I gave up for a few weeks.
Then I finally got the bright idea to check out some online tutorials. (Why hadn't I tried that before??) I found one that was pretty easy, sticking a head pin through the hole, curving it up and around and making a little hook with itself behind the head. Presto!
After all that hemming and hawing, I eventually finished.
Maybe the time it took was part of the process. Maybe I needed time to recharge after each roadblock. I'm open to that idea. But I'm glad I wasn't stopped indefinitely. This necklace delights me so much! Thanks be to the infinite creative energy that keeps projects moving along -- even at a snail's pace!
Showing posts with label Silver. Show all posts
Wednesday, October 31, 2012
Thursday, September 20, 2012
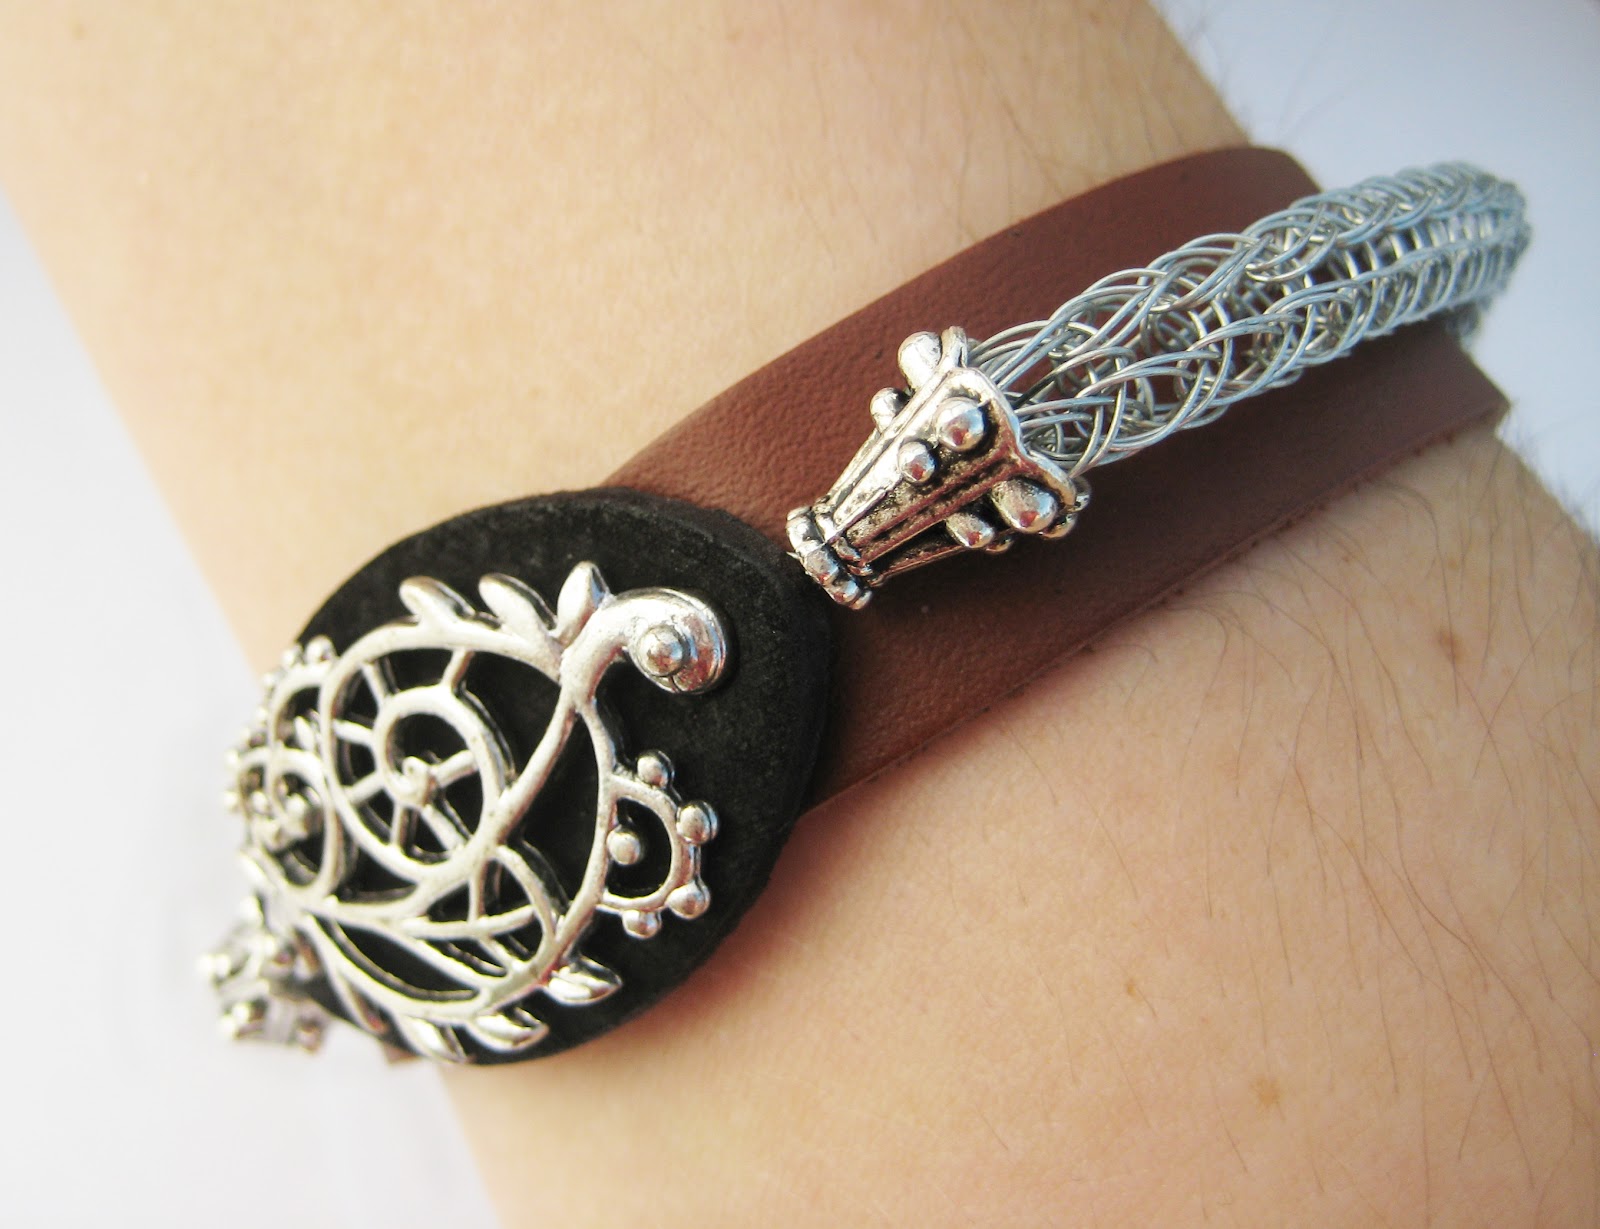
You Leather Believe It! (Flight of the Brain Bee)
Inspiration is notoriously capricious....
Over the summer, I was flipping through an Arhaus jewelry catalog (see the company's site here), and saw their "Swirls and Pearls" wrap bracelet, shown below.
This image entered my mind, and planted itself there like a flowering plant. A funny thing happened then -- a brain bee came and visited this flower, then went and cross pollinated with my Viking Knit plant. The seed thereby produced dropped into my cerebral soil and matured into what later became this bracelet.
Something about the leather really captivated me. I think that the idea of the hide being a base or anchor for the VK chain is not only an interesting experiment into different media, but the qualities of each material compliment each other and form into a whole that they couldn't have been all by themselves.
Thank you, mysterious brain bee!
Monday, July 23, 2012
Breaking the Rules (Which I've Made Up Anyways)
Here is my silver double knit bracelet from my last blog.
A sharp observer might notice that this piece does not have end caps on the raw ends of the chain like most of my other works. See how the end of the weave just stops right next to the pearls?
"No!" you say, "How criminal to leave the ends uncovered! It defies all sense!" Or maybe that's just what my inner control freak says, since I've never made a piece this way before.
There is a method to my madness, though.
I tend to design by my gut -- if I'm not pleased with a look, I will try something else.
When I was finishing this breacelet, I put the bead caps on to see how it fit, and the bead caps seemed too large to me, like when a little kid tries on a full-sized hard hat. So I fiddled with the combination of beads and end caps and clasp until I reached a look that satisfied me.
A sharp observer might notice that this piece does not have end caps on the raw ends of the chain like most of my other works. See how the end of the weave just stops right next to the pearls?
"No!" you say, "How criminal to leave the ends uncovered! It defies all sense!" Or maybe that's just what my inner control freak says, since I've never made a piece this way before.
There is a method to my madness, though.
I tend to design by my gut -- if I'm not pleased with a look, I will try something else.
When I was finishing this breacelet, I put the bead caps on to see how it fit, and the bead caps seemed too large to me, like when a little kid tries on a full-sized hard hat. So I fiddled with the combination of beads and end caps and clasp until I reached a look that satisfied me.
Tuesday, July 10, 2012
Double-Knit Explained
This next bracelet was an experiment in the thinner 26-gauge wire. Thinner wire is more flexible, and so allows for a chain with a smaller diameter, more flexibility, and double- or triple-knit weave.
Check out my next blog to learn more about how I finished this piece.
Double knit looks more dense than single knit. People sometimes think "double" refers to two wires being woven at the same time. It actually means that one wire is wrapped around a "row" twice. I make my loops around my dowel like I would for a single knit, but when I finish going all the way around, I make a second set of loops around the ones I just made. After completing this, I start on another "row."
It can be a tricky technique because it is easier to make a mistake in the bramble of wire it makes! But I enjoyed the challenge, and maybe someday I will even try triple knit.
Check out my next blog to learn more about how I finished this piece.
Thursday, June 21, 2012
Taking a Chance
After trying beads once before on a piece (see the copper bracelet from this post), I wanted to try a different look. I aimed for a more elegant and flashy design.
Here is the product, a bracelet made with 24-gauge silver colored wire and black and red czech glass beads.
I read somewhere that it is inadvisable to pull the wire chain through the draw plate when you have woven beads into it. (If you don't know what I'm talking about, see the terminology bullet points.) However, I have done exactly that with this piece. I was nervous to do so, because, it IS in fact, a bit inadvisable.
Why? The beads could have warped the wire mesh, making it messy-looking. (That may have been OK, or it may have been just ugly.) There was also a slim chance that I could have broken the chain trying to pull it through the draw plate.
But what brave Viking doesn't take some crazy chances once in a while?
Here is the product, a bracelet made with 24-gauge silver colored wire and black and red czech glass beads.
Why? The beads could have warped the wire mesh, making it messy-looking. (That may have been OK, or it may have been just ugly.) There was also a slim chance that I could have broken the chain trying to pull it through the draw plate.
But what brave Viking doesn't take some crazy chances once in a while?
Monday, May 28, 2012
Further Creations, New Designs
It is my misfortune on this adventure not to have all the proper tools of visual record-keeping. Not only do I lack a fully-functioning digital camera, but I also am still learning how to photograph my work well. So we will all have to bear with some blurry pictures, I am sad to report. But that is part of the adventure! So, onward!
I am pleased to present to you my next four pieces (made in summer 2011). These pieces are not especially magnificent, but I was quite excited to have completed them. I was just starting to get the hang of things, and I even got to experiment with some new elements.
In this image there are four new creations, as well as my first bracelet (the green one). The silver one with the pendant is a necklace, and the others are bracelets made of copper.
Here is a close-up of the pendant. Those who know more about jewelry-making than I will see how clumsily I attached it to the necklace. I am still searching for better ways of doing this, as I intend to make more pieces with pendants. If you have ideas, feel free to suggest in comments.
The copper bracelet below is made with the double-knit technique. It's quite a different look than the single-knit used in my other works, and it cannot be made quite as small in diameter as single with wire of the same gauge.
I am rather proud of this next bracelet; not only did I craft very it quickly, but it also represents the introduction of beads into the loops. The winds were strong in my crafting sails that morning! The beads are wooden; the wire, copper.
Subscribe to:
Posts (Atom)