Friday, February 1, 2013

Tapering (and Getting on My Soap Box About Good Photography)

Hello, fellow adventurers! Here's a new necklace -- copper with wooden beads. (Looks quite a lot like a previous bracelet I've done!)


While I was finishing up the chain, pulling it through the draw plate, I felt as though it would benefit from some tapering at the ends near the clasp.

Here's the necklace that I modeled it after.


A side note here on the photography. For anyone who is thinking about selling anything online -- even on eBay or craigslist -- make sure you get at least semi-decent pictures, because it makes a world of difference how your item is perceived. Yes, I got a bit lazy with my necklace, as you can see. And whoever shot the other jewelry (possibly their creator,  Jan Raven) is a superior photographer. But it goes to prove my point -- good photography makes things look very attractive. Bad photography.... Well, I apologize for not taking better photos before sending this piece off to its owner!

Back to my point: this was the first piece in which I used the draw place to achieve a long taper. I am mostly satisfied with the result, although when I first looked at it, I wished my draw plate had more holes that were less drastically different sizes from one another so I could make a more gradual taper.

On the other hand, looking at Jan's jewelry, I rather think she had the same process. Instead of a slowing decreasing diameter, there is an illusion of gradual tapering where in fact there is one diameter for the most of the length of the chain between the beads and the clasp.

I have learned enough about design to know that it is the illusion that matters, not the reality. So, I think I can declare my experiment a success, and move on to the next piece!

Saturday, January 5, 2013

Crafter's Block

I have no finished pieces right now, as I have hit a slow period in my crafting progress. However, I am never without something exciting in the works! I have a few pieces that are almost done or still in the middle of production. This two-tone bracelet is "almost done."

"But looks finished to me," you might say.


It is indeed finished enough to be wearable, so, in a way, you are right. I had hoped that at this point it WOULD be done. However, I am not at all satisfied with its overall form. Do you see how it makes a sort of teardrop shape? I would hope from a simple design like this that it would be more circular when laying on a flat surface.

On a larger wrist, this may not matter much. But on a smaller wrist (like mine), it lies awkwardly, weighed down by the clasp.

I am not sure of the answer to this problem. Should I attach some charms along the length of the chain? Should I get some different end caps? Should I change the design entirely?

For now, I am at a standstill. Feel free to make suggestions in comments, even if you are not an expert jewelry maker. I will update you as soon as something happens on this front!

Wednesday, November 14, 2012

Matching Madness


This bracelet came about when I noticed that I had some beads that matched a an outfit that I planned on wearing for a wedding this summer.

First, here's a close-up of the copper chain (which, if I do say so myself, turned out great).


And here it is! I was so excited to make this bracelet -- just look at how well the greens and blues match! I only had 2 days to whip this one up, but it was worth the effort.


I can proudly say that this bracelet is well-balanced, which makes it feel nice on my wrist, and also just looks fabulous. I'm so glad for the spark of inspiration my outfit gave me!

Wednesday, October 31, 2012

Hoops and Loops

You know what makes things take forever? Procrastination and fear.

Making my circuit board necklace took the span of a many weeks. Weeks! It took me so long because there were two things that this piece was missing that I had trouble making, and was timid about trying. One was end caps for the VK chain. The other was a bail, a thing that would hook the pendant onto the necklace.

Thanks to the magic of the internet, I found two tutorials that helped me fill those gaps.

There's this one on the Katrina Lum Designs blog on end caps.
And this one on bails made with head pins,which is a small length of wire with a flat knob at the end to keep things from falling off.

As I was making my copper necklace for the circuit board pendant, I knew I wanted silver end caps to go with the silver in the bits of the circuit board, but I didn't really like the style of either of my purchased end caps. The end cap tutorial was awesome for the look I wanted, but after a failed attempt at making a pair, I was discouraged and it took me a while to get up the guts to try again.


You can see in this image below that it didn't come out perfect (there is a gap in the loops).


Then, when I saw that the circuit board pendant didn't come with a bail to attach it to my necklace, I thought "No bail? No problem."

But pride comes before the fall.

I thought maybe I could just put a silver ring through the hole, but the pendant is almost a centimeter thick. I tried to make my own bail with some 20 gauge wire that I ordered especially for the job, but I had no idea what I was doing, so nothing I made turned out very nice-looking. I was starting to get really irritated, so I gave up for a few weeks.

Then I finally got the bright idea to check out some online tutorials. (Why hadn't I tried that before??) I found one that was pretty easy, sticking a head pin through the hole, curving it up and around and making a little hook with itself behind the head. Presto!


After all that hemming and hawing, I eventually finished.


Maybe the time it took was part of the process. Maybe I needed time to recharge after each roadblock. I'm open to that idea. But I'm glad I wasn't stopped indefinitely. This necklace delights me so much! Thanks be to the infinite creative energy that keeps projects moving along -- even at a snail's pace!

Thursday, October 18, 2012

Branching Out -- Nerd Style

As with many of my other stories, this one starts off with an object -- a piece of raw material from which inspiration grew.

Meet mother... board.


OK, it's not "mother board," per say, but a circuit board. It might not even be from a desktop computer, but you never know.

I saw this little number on clearance at my favorite hobby shop. Score! It's always exciting to try new stuff on the cheap.

Next, I took some time to think about what sort of chain it should be attached to.

I thought the copper wire would look pretty sharp with the green, but I wanted to use silver findings for the end caps and clasp to echo the silver-colored bits in the pendant.


You can see from the above picture that at first I had the hook clasp in the "middle" of two equal lengths of silver rings. I decided to change it so that the length could be adjusted by the wearer.


The result is a wonderfully, ostentatiously geeky necklace unlike anything I've yet made!


Read my next blog for some of the hoops I had to jump through to make useful hoops!! (The pendant didn't come with a way to attach it to a necklace! Ack!)

Thursday, September 20, 2012

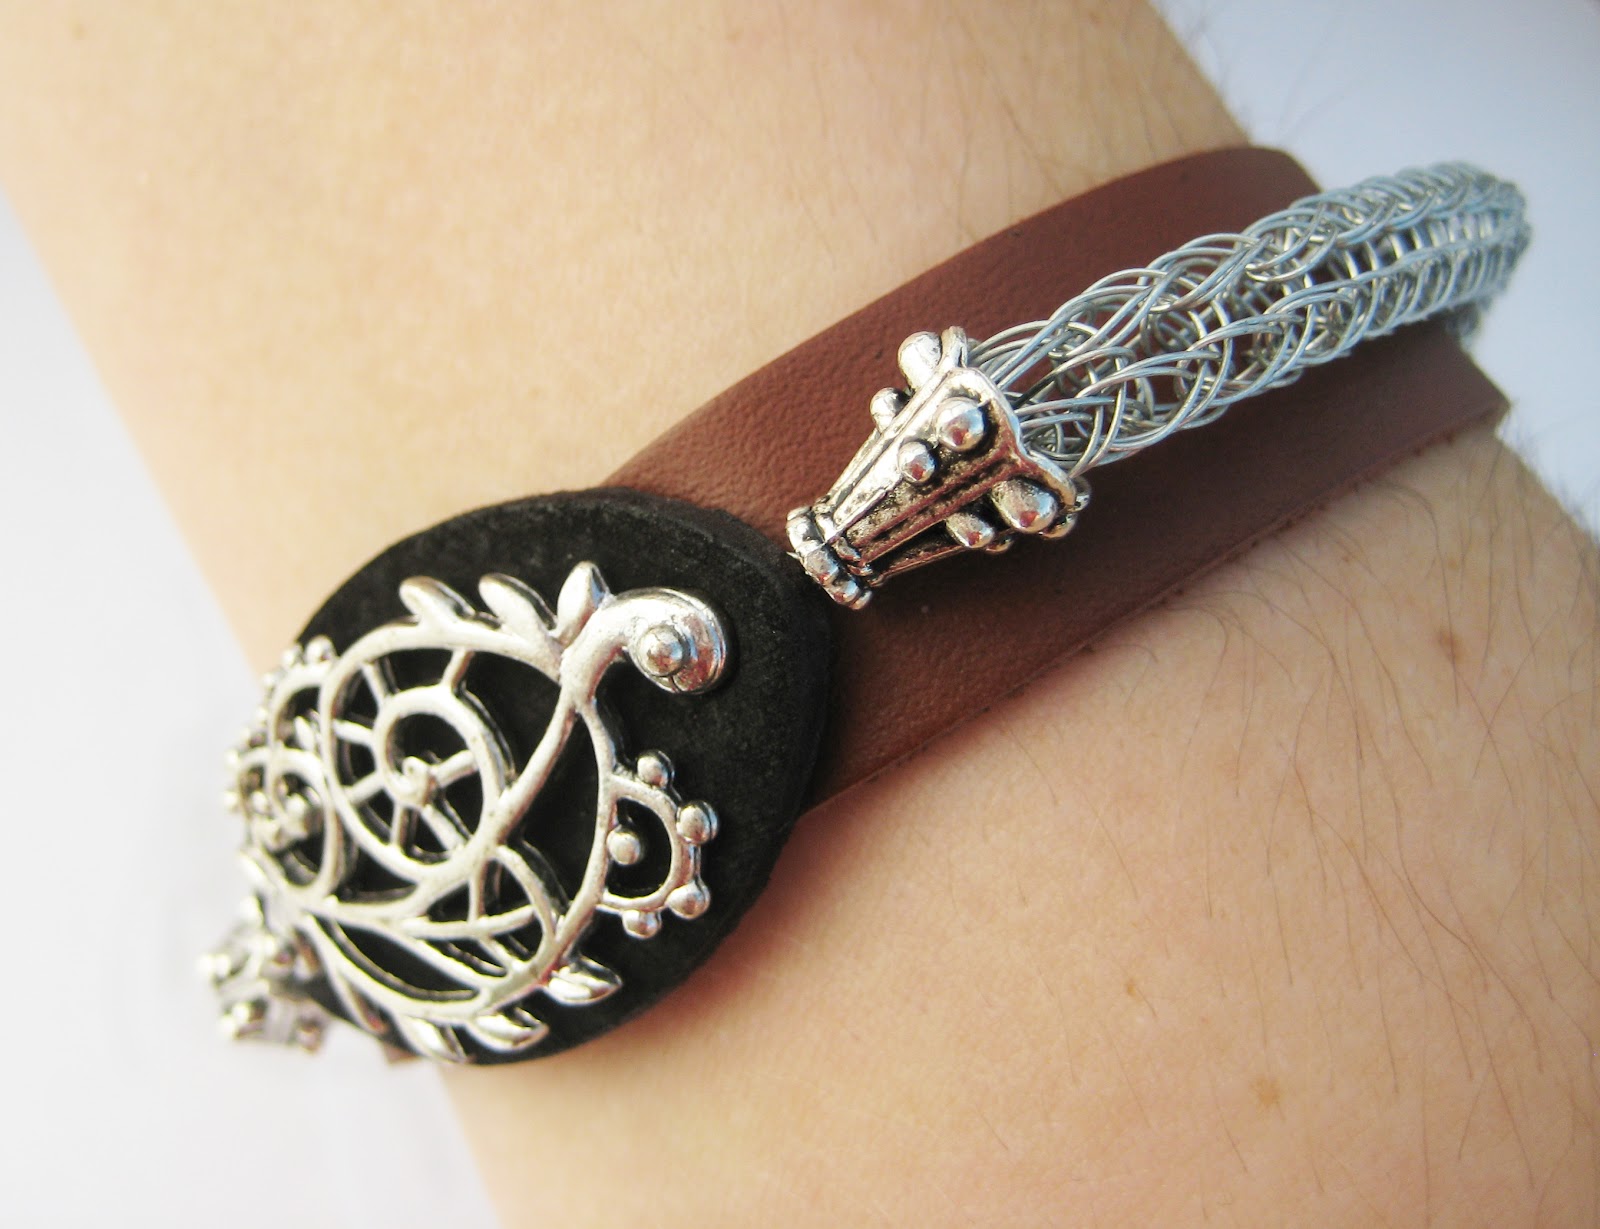
You Leather Believe It! (Flight of the Brain Bee)

Inspiration is notoriously capricious....

Over the summer, I was flipping through an Arhaus jewelry catalog (see the company's site here), and saw their "Swirls and Pearls" wrap bracelet, shown below.

Swirls & Pearls Wrap Bracelet

This image entered my mind, and planted itself there like a flowering plant. A funny thing happened then -- a brain bee came and visited this flower, then went and cross pollinated with my Viking Knit plant. The seed thereby produced dropped into my cerebral soil and matured into what later became this bracelet.


Something about the leather really captivated me. I think that the idea of the hide being a base or anchor for the VK chain is not only an interesting experiment into different media, but the qualities of each material compliment each other and form into a whole that they couldn't have been all by themselves.

Thank you, mysterious brain bee!

Tuesday, September 11, 2012

Xtreme beads!

Many of my pieces have featured beads inside the weave. But this green bracelet takes it to a whole new level.


Here is the weave. You can't get away from the beads. They are EVERYWHERE.

There is a red bracelet that I tried putting a bunch of beads in just at the ends, as you can see below.


It didn't turn out as striking as I had hoped, however. But it helped me learn for the next bracelet.... I decided to take the leap and try something I'd been hoping to experiment with.


The subtle beads, numerous as they are, cast a nice effect over the whole length of an otherwise bland VK chain. It also beefed up the single knit weave so it is a tougher. I think I may use this design again....